_画板-1-1.png)
If my TPE compound looks fine at first and then drifts in hardness, color, or melt flow, I pay twice: once in scrap, and once in lost trust. I fix that by choosing the mixer the same way I choose resin: with facts.
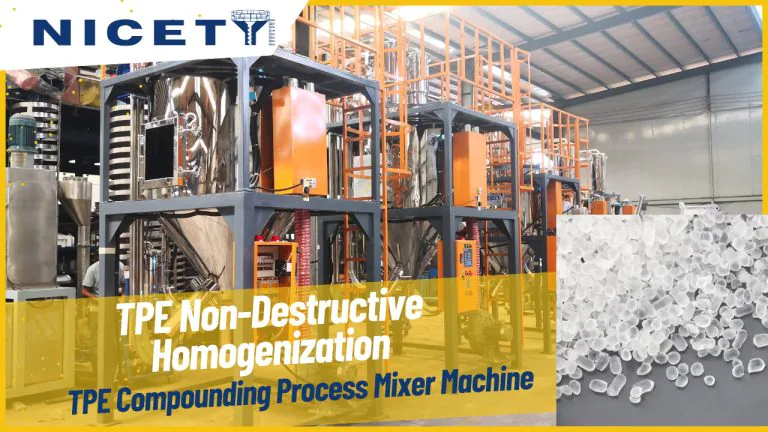
Choose a TPE compounding mixer by matching shear and temperature control to your formulation, then proving it with dispersion, stability, and energy data. If you also use a Non-Destructive Homogenization Silo System, you can protect pellets, reduce segregation, and keep every extruder feed consistent.

I learned the hard way that a “strong” mixer is not always the “right” mixer. When I slow down and map materials, targets, and risks, the decision becomes simple, and the line becomes stable.
What makes TPE compounding uniquely hard, and why does it change mixer selection?
If I treat TPE like a normal polyolefin compound, I get soft clumps, unstable torque, and fillers that never fully wet out. Then I push the extruder harder, and I burn oil, scorch polymer, or ruin odor. That is how a small mistake becomes a big cost.
TPE mixing needs controlled shear, fast wetting, and strict temperature control because elastomer phases can heat up fast, trap oils, and form agglomerates. The best mixer is the one that hits dispersion targets while staying below the thermal and shear limits1 of the elastomer system.
In my projects, the “difficulty” comes from three places: (1) elastomer viscosity and elasticity2, (2) oil and plasticizer management3, and (3) powder filler wetting and deagglomeration4. When those three are stable, the rest becomes routine.
Dive deeper
I start by writing down what my compound must do. I list hardness range5, tensile and elongation targets6, compression set needs7, odor limits8, and color limits9. Then I tie each target to a mixing risk. If hardness drift is my pain, I suspect oil distribution and pellet-to-pellet variability. If tensile is weak, I suspect poor filler dispersion or polymer degradation. If appearance is bad, I suspect pigment dispersion or scorch.
I also accept one truth: in elastomer systems, temperature is not just a number. Temperature changes viscosity, and viscosity changes shear. This means a mixer with weak cooling can turn a good formulation into a bad one. I often see local hot spots in high-shear zones, even when the average temperature looks safe. That is why I like mixers with strong jacket design, stable rotor clearances, and real torque monitoring.
Here is the simple way I structure the decision. I rate my formulation by dispersion demand and heat sensitivity, then I pick a mixer family10 that fits.
| Formulation feature | What it means in mixing | Mixer capability I demand | Typical risk if wrong |
|---|---|---|---|
| High oil (soft grades) | Wet-out must be fast, oil must not separate | Good wetting, stable temperature, anti-slip feeding | Oil bleed, hardness drift, sticky lumps |
| High filler (CaCO₃, talc) | Agglomerates must break and wet | Enough shear + residence time | Low tensile, poor surface, filter plugging |
| Pigments / masterbatch | Fine dispersion, no color specks | Controlled shear, good distributive mixing | Color streaks, specks, rejects |
| Heat-sensitive elastomer/additives | Shear heat must be removed | Strong cooling + precise control | Scorch, odor, yellowing, property loss |
When I finish this table, I stop guessing. I am ready to choose the mixer by function, not by brand name.
Which mixer types actually fit TPE compounding, and how do I compare them with real criteria?
If I only compare mixer “capacity” or “motor power,” I get fooled. I have seen big motors that still make unstable compound. I have also seen smaller machines that produce better dispersion because the control and geometry are right.
For TPE compounding, I compare mixers by shear style (dispersive vs distributive), temperature control, residence time control, feeding method, and discharge behavior. The right choice is the one that reaches your dispersion specs at the lowest temperature and the most stable torque.
Dive deeper
In practice, I usually compare three compounding routes: (1) internal mixer + downstream extrusion/pelletizing, (2) co-rotating twin-screw extruder as the main mixer, or (3) continuous high-intensity mixer for pre-mix plus extrusion finishing. Each route can work, but each route has a different “best fit.”
I keep my comparison grounded in what the line must do every day: stable output, stable quality, low energy, and low labor. So I score each route across the same criteria.
| Option | Strength in TPE | Weakness in TPE | Best use cases | Typical control points |
|---|---|---|---|---|
| Internal mixer (Banbury-style) + extruder | Strong dispersive mixing, good for high filler | Batch variation if handling is weak | High filler TPE, tough dispersion jobs | Rotor speed, ram pressure, dump temp, torque curve |
| Co-rotating twin-screw as main compounding mixer | Continuous, good control, flexible feeding | Can over-shear heat-sensitive systems | Medium to high throughput, many SKUs | Screw design, melt temp, SME, side feeder stability |
| High-intensity pre-mix + extruder finishing | Fast distributive pre-blend, helps feeding | Limited true dispersive power alone | Dry blends, powder wetting before extrusion | Mix time, RPM, temperature rise, powder dosing |
I also use data targets instead of feelings. I define acceptance criteria like these:
- Dispersion: screen pack pressure stability, filter life, and visual speck count.
- Property stability: hardness (Shore A) standard deviation, MFR variation, tensile Cpk.
- Thermal safety: peak melt temperature and odor/yellowing checks.
- Efficiency: specific energy (kWh/kg)11, scrap rate, and labor per ton.
If a mixer option cannot hit these targets without pushing temperature too high, I reject it. I do not negotiate with physics.
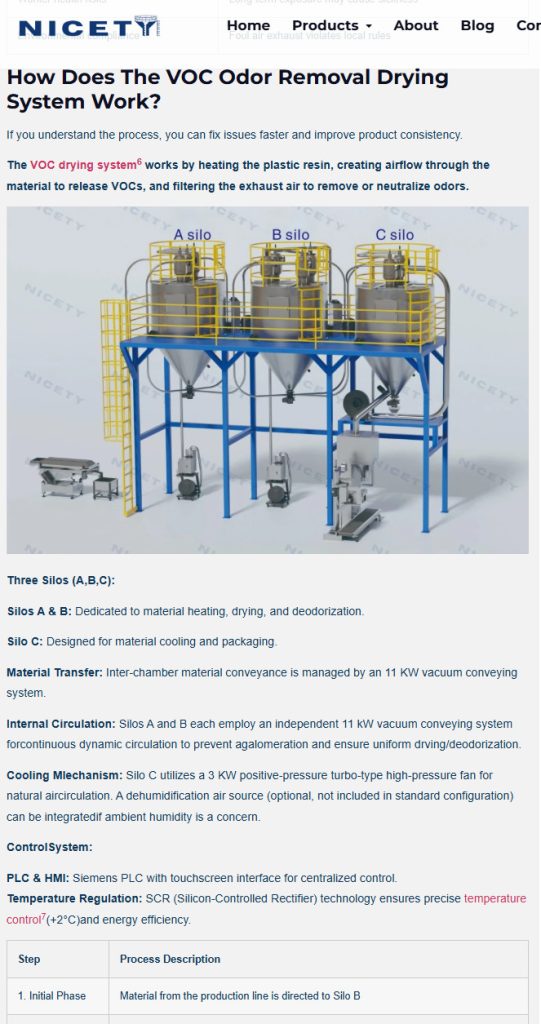
Why does the Non-Destructive Homogenization Silo System12 matter so much after mixing?
If I make perfect compound and then ruin it in storage and feeding, the mixer gets blamed, but the real problem is handling. I used to think “a silo is just a silo.” That idea cost me. Pellet segregation and pellet damage can silently destroy consistency.
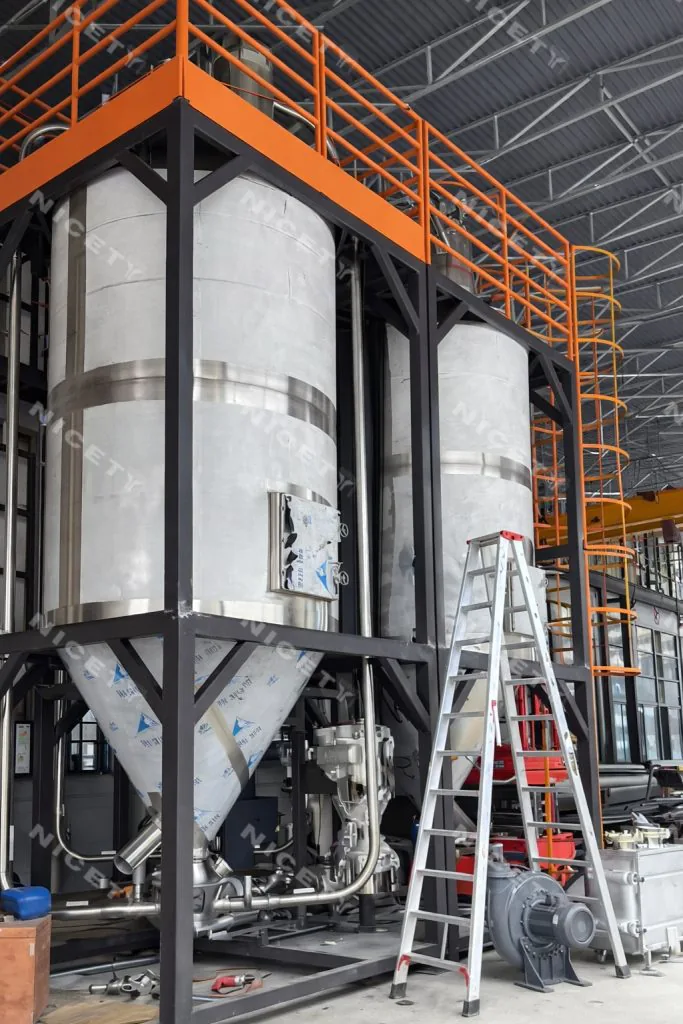
A Non-Destructive Homogenization Silo System protects pellets while it equalizes batch-to-batch and within-batch variation, so the extruder sees a steady material stream. It reduces segregation, avoids pellet grinding, and improves process stability without adding shear or heat.
Dive deeper
When I say “non-destructive homogenization,” I mean two things: (1) the system mixes material gently, and (2) the system does not create fines, dust, or pellet fractures. In elastomer compounds, this matters more than people think. TPE pellets can be softer than standard plastics. They can smear, deform, or generate fines if the handling is rough. Those fines then bridge in hoppers, block filters, and cause feed drift. Feed drift then becomes melt pressure drift. Melt pressure drift becomes product variation.
The working principle I focus on is controlled material movement. Instead of letting gravity form stable flow channels, a homogenization silo uses guided circulation or staged blending that pulls material from different zones and re-combines it. The goal is to reduce “first-in first-out banding” and reduce density-driven segregation. This is especially important when I run multiple mixer batches that must become one consistent production lot.
I judge the silo system with measurable outcomes:
| Handling issue | What I see on the line | What the homogenization silo changes | What I measure |
|---|---|---|---|
| Pellet segregation | hardness swings, color drift | blends pellets across zones | Shore A stdev, color delta, MFR stdev |
| Fines generation | hopper bridging, filter load | gentle movement, low impact | fines %, filter clog frequency |
| Batch-to-batch differences | unstable extrusion settings | buffer and equalize variations | extruder pressure stability, scrap rate |
| Feeding instability | surging output | steady bulk density at feed | output fluctuation %, regrind ratio |
I also care about one practical point: cleaning and changeover. If a silo is hard to clean, it becomes a contamination risk in multi-SKU production. So I prefer systems designed for fast discharge, low dead zones, and clear inspection access.
In short, the silo is not “after the process.” For me, it is part of process control. It turns good mixing into stable production.
How do I select a mixer that works for all elastomer materials, not just one TPE grade?
If I only choose a mixer for today’s grade, I lock myself into one product. Then I lose new business because the line cannot handle higher filler, different oils, or different elastomer bases. I need a mixer decision that survives future SKUs.
To cover all elastomer materials, I choose a mixer based on the worst-case viscosity and dispersion demand, then I build in control range: rotor/screw flexibility, strong cooling, stable feeding, and predictable residence time. This gives me a wide operating window without burning or under-mixing.
Dive deeper
When I look across elastomer materials used in TPE-style compounding, I see large differences in how they behave under shear. Some systems soften quickly with temperature and become easy to mix. Other systems stay elastic and resist flow, so they trap powders and create “fish eyes.” Oils can make wet-out easier, but they can also cause slip and feeding instability. Fillers can improve stiffness, but they can also destroy elongation if they are not dispersed well.
So I plan for the extremes. I write down a “worst-case envelope” for my materials: highest filler loading, lowest oil grade, and the most heat-sensitive additive package. Then I pick equipment that can handle that envelope without breaking.
Here is the checklist I use for elastomer-wide selection:
| Critical factor | Why it matters for elastomers | What I look for in a mixer | Simple acceptance test |
|---|---|---|---|
| Cooling capacity and control | shear heat rises fast | large jacket area, stable coolant flow | peak melt temp stays below limit |
| Dispersive + distributive balance | fillers need break + spread | proven rotor/screw geometry options | dispersion + property Cpk |
| Torque and speed range | viscosity changes a lot | wide RPM, reliable torque monitoring | stable torque curve per batch |
| Feeding design | oils + powders can surge | anti-bridging, accurate loss-in-weight dosing | feed rate stdev low |
| Cleanability | cross-contamination risk | low dead zones, easy access | changeover time and residue checks |
| Scale-up predictability | lab to plant must match | known scale-up rules, data logging | same SME window works |
I also rely on two “control numbers” that keep me honest:
1) Specific Mechanical Energy (SME): energy put into the material per kg. This helps me compare different machines and sizes. If SME is too low, dispersion is weak. If SME is too high, I risk degradation and odor.
2) Temperature rise per unit energy: if temperature jumps fast when I add energy, the system is heat sensitive, and I need better cooling or lower-shear mixing steps.
This is why I often pair a good mixer with a good handling system. The mixer gives dispersion. The Non-Destructive Homogenization Silo System protects that dispersion and makes it repeatable at the extruder.
How do I set a practical decision workflow13 so I do not waste money on the wrong mixer?
If I buy equipment based on a brochure, I pay later in modifications. If I only run one trial, I miss the real problems that show up on day five, not day one. I need a workflow that forces reality to show up early.
I choose a mixer with a step-by-step workflow: define product targets, map risks, run trials with measured dispersion and stability KPIs, then validate handling with a Non-Destructive Homogenization Silo System to prove the whole line stays stable under normal production shifts.
Dive deeper
My workflow has four steps, and I refuse to skip them.
Step 1 is formulation mapping. I list polymer bases, oil type and level, filler type and level, and any heat-sensitive additives. Then I set hard KPIs: hardness range5, MFR range, tensile minimum, and color delta. I also set process KPIs: output stability, melt temperature limit, and energy target.
Step 2 is equipment matching. I choose a mixer route that can hit dispersion at a safe temperature. I also check the control system. If it cannot log torque, temperature, and feeding rate, I treat it as a risk. Data is not a luxury. It is how I prevent blame games.
Step 3 is trial design. I do not run “one trial.” I run a small matrix:
- low shear vs high shear setting
- short vs long residence time
- different filler feeding points or addition order
- with and without a gentle homogenization step
Then I measure outcomes. I do not only judge by “looks good.” I measure hardness standard deviation, melt pressure stability14, and filter life.
Step 4 is line validation with handling. This is where the Non-Destructive Homogenization Silo System proves its value. I blend multiple batches in the silo and run the extruder for long enough to see real drift. If the silo reduces drift and reduces surging, I lock it into the process design. If it creates fines or dead zones, I fix the design before I sign anything.
Here is a compact scoring table I use to decide:
| Category | Weight in my decision | Pass indicator |
|---|---|---|
| Quality stability (hardness/MFR/tensile) | 40% | low stdev, high Cpk |
| Thermal safety (odor/yellowing/peak temp) | 20% | peak temp below limit |
| Throughput and labor | 15% | stable output, low manual work |
| Energy per kg | 15% | meets plant target |
| Changeover and cleaning | 10% | short changeover, low contamination |
This keeps me disciplined. It also keeps procurement aligned with production reality.
Conclusion
I choose a TPE mixer by shear, cooling, and control range, then I prove it with dispersion and stability data, and I protect the result with a Non-Destructive Homogenization Silo System.
-
Understand the importance of thermal and shear limits in TPE mixing to avoid product degradation. ↩
-
Understand the challenges posed by elastomer viscosity and elasticity in TPE compounding for better mixer selection. ↩
-
Explore effective strategies for managing oils and plasticizers to improve TPE compound quality. ↩
-
Learn techniques for ensuring proper wetting and deagglomeration of fillers in TPE compounds. ↩
-
Discover why defining hardness range is crucial for successful TPE compounding and mixer selection. ↩ ↩
-
Find out how to establish effective tensile and elongation targets to enhance TPE compound performance. ↩
-
Explore the significance of compression set needs in TPE formulations for better product stability. ↩
-
Learn about strategies to control odor limits in TPE compounds for improved user experience. ↩
-
Discover effective methods for maintaining color limits in TPE compounds to ensure visual quality. ↩
-
Explore criteria for selecting the appropriate mixer family to meet your TPE compounding needs. ↩
-
Understand the concept of specific energy and its impact on TPE compounding efficiency. ↩
-
Discover how this system can enhance your TPE compounding process by reducing segregation and improving consistency. ↩
-
Explore a structured decision workflow to ensure you choose the right mixer for TPE compounding. ↩
-
Explore techniques to maintain melt pressure stability for consistent TPE production. ↩

_画板-1-副本-3-pxeey2xejyohpkvf07tglhvew6ks2ts3pjvhagm60c.png "NICETY MACHINERY Co., LTD")